Thursday, February 26

CROWLEY’S TIP #13: Protect your boat from lightning strikes

The odds of your boat being struck by lightning are about 1.2 in 1,000 but when it comes to lightning protection, you’re on your own. No federal or state laws require manufacturers to install a grounding system. While no one has found a foolproof answer, there are some easy preventative measures to take so you don’t end up like this Chicago sailboat.


Lightning is a spark that can reach over 5 miles in length, attain a temperature of approximately 50,000°F, and contain over 100 million electrical volts.

Sometimes a damaged or missing VHF antenna is the only clue that an unattended boat has been struck. Some vessels have little or no damage after a strike, but an immediate short-haul is a must. When lightning exits your boat, it can go through the hull itself or via a through-hull fitting. This may cause a gradual leak that could go unnoticed.


No one keeps track of how much damage boats sustain from lightning each year, but costs likely total millions of dollars. Much of the damage results from ruined navigation, radio and other electronic equipment. On sailboats, grounding the mast is the best way to prevent lightning from sparking around the boat as it seeks a conducting path.


Sailors should ground the masts on their boats using a No. 4 gauge copper wire connected to conductors in the water. Freshwater boats require as a minimum a long metal strip along the bottom of the hull. Sailors should also ground the wire to other metal conductors in the water, such as the prop.

Another option is to mount a lightning conductor, like a push pole, to attract lightning strikes. Boaters should be certain the conductor is well-grounded to the water and they should take care to avoid contact with the conductor or the waterline."

Tuesday, February 24

CROWLEY’S TIP #12: Continuity is key to corrosion protection.

Performing a continuity test ensures that the anti-corrosion devices on the engine package are functioning properly. It also uncovers any breaks in the protection of your engine. A digital multimeter is all you need.


Continuity test
This test can be done with or without Mercathode System installed. To conduct this test, take your digital multimeter and set it for continuity, which is the ohms setting. You need to test for good continuity between all of the major metal parts on the engine and drive unit, especially the sacrificial anodes. Your readings should be no higher than 150 milliohms, 1.5 kiloohms, or .15 ohms. If you find no continuity between any of the external metal parts that you’ve tested, you’ll need to search for the cause of the poor electrical connection. It could be a broken continuity circuit wire. Once you’ve located and fixed the problem, the continuity test should be repeated to ensure you’ve fixed the problem.


Using Stainless Steel Propellers
Stainless steel is a very strong metal that resists corrosion. But stainless steel propellers can corrode if not protected. Deep pits in the propeller blade are signs of loss of continuity between the propeller and the drive unit. This can happen when a continuity washer is not installed. Late-model propellers now have a different type of sleeve inside that keeps good continuity between the propeller and drive unit. The prop should be removed and inspected on a regular basis to make sure it is making good electrical contact with the drive unit. During your inspection, lubricate the prop shaft for further corrosion protection. Never allow fishing line to maintain contact with stainless steel components because eliminating oxygen from the surface of stainless steel allows corrosion to occur.


To wrap up our series on corrosion, following are some basic tips we’ve covered:


· The best defense against corrosion is regular preventative maintenance, like replacing wasted anodes and keeping a complete coat of paint on vulnerable surfaces
· Inspect anodes regularly
· Regularly prime and paint nicks and scratches
· Do not paint sacrificial anodes
· Other corrosion inhibitors are Mercathode systems, galvanic isolators and continuity devices
· Corrosion testing is an important part of your protection plan

Thursday, February 19

CROWLEY’S TIP #11: When your vessel is connected to shore power, it can cause corrosion to your vessel and others.

Continuing our series on corrosion, we’ll talk about the risks when connected to shore power. Then we’ll explain how to test installed corrosion systems to ensure they are providing the best protection.

Whenever a boat is connected to shore power, the hull and drive system is connected to the shore grounding system and to other adjacent vessels (also connected to shore power) via the grounding conductor in the shore power cable. This connection, while required for safety, creates a galvanic corrosion cell involving the dissimilar metals between boats and between a boat and the shore grounding system.


Shore power corrosion protection
When a boat is connected to AC shore power, the grounding lead provides protection from electrical shock, but it also connects underwater metal parts from your boat to metal parts on neighboring boats that are also using shore power. As a result, destructive low voltage transient galvanic currents can flow between them. These currents can cause severe corrosion damage just in a matter of hours. The increased corrosion potential is more than sacrificial anodes and even a Mercathode can handle. The best remedy is a galvanic isolator. This is a solid state device that is series-connected into the boats green safety grounding circuit inside the boat. The isolator filters out destructive low-voltage transient galvanic currents while maintaining the integrity of the boat’s safety grounding circuit.


Corrosion protection testing
To make sure that the drive unit is getting the best possible corrosion protection, it’s very important to have the system tested on a regular basis. The first test measures hull potential. This requires a Mercathode reference electrode tester and digital multi-meter. If the unit is equipped with a Mercathode system, make sure the battery has a full charge. This test should be performed after the boat has been in service for one or two weeks because new boats may give inaccurate readings. Don’t rock the boat as you board as this may alter the readings. Boats should be moored for at least 8 hours prior to conducting the test. This allows the sacrificial anode or Mercathode system to polarize the surrounding water. When you’re ready to begin, plug the negative meter lead into the negative receptacle on the meter. Then, attach the other end of the lead to the engine ground. Plug the end of the reference electrode tester into the positive receptacle of the meter. Set the meter to read between 0 and 2,000 millivolts. Lower the reference electrode tester into the water within six inches behind the propeller. Then, check the reading.


In fresh water, the reading should be between 750 and 1,050 millivolts. In salt, polluted or mineral-laden waters, the reading should be between 850-1,100mv. If readings aren’t within normal limits, additional troubleshooting should be done. Make sure the test is conducted again if corrective measures are taken.


Mercathode System Testing
If your boat is equipped with a Mercathode system, there is a simple way to test if the system is operating properly. The goal is to check the output from the Mercathode controller. When the boat is in the water, disconnect the orange wire that comes from the anode at the mercathode controller. Set the digital reader to show milliamps. Connect the black meter lead to the terminal on the controller. Connect the red meter lead to the end of orange wire. If using the blue or black Mercathode controller, the reading should be 25 or less milliamps, to as much as 200 milliamps in saltwater areas. If using the red Mercathode controller, the readings should be less than 25 milliamps in fresh water areas to as high as 400 milliamps in saltwater areas.


Stay tuned for our next installment when we talk about continuity testing and stainless steel corrosion.

Tuesday, February 17

CROWLEY’S TIP #10: Protect your investment against corrosion

In CROWLEY'S TIP #9, we talked about the causes of corrosion and said sacrificial anodes are one tool that will help prevent it. This is only one of many preventative measures you can take. Below, we continue the discussion on how to protect your investment against corrosion.

A Coat of Paint
The first line of defense against corrosion is the protective paint covering on your engine and components. It is important that this finish is maintained, as it protects the aluminum from exposure to corrosion. Always repair paint scratches and chips promptly and never use a wire brush to sand an engine surface. This will embed small steel particles from the brush into the aluminum, creating destructive “galvanic cavities” for corrosion to take place.

Continuity devices
While they all outwit corrosion, paint, sacrificial anodes and continuity devices all work differently. Paint blocks corrosion while sacrificial anodes absorb it. By contrast, continuity devices maintain contact between all vulnerable components on an engine. This circuit is then connected to a zinc so that this sacrificial anode takes the hit from any electrical activity going on. There are several types of continuity devices to accommodate your type of engine. Whatever anode the circuit is connected to must be periodically inspected and replaced when corroded 50% or more.

Mercathode system
MerCruiser offers the MerCathode system (available at Crowley’s for $95.45 plus tax), which provides automatic protection against galvanic corrosion for all makes of outboards and stern drives. It is a solid-state device that operates off a boat's 12-volt battery and provides protection by impressing a reverse blocking current that stops the destructive flow of galvanic currents. The Mercathode system has two parts: the controller and the anode.

The controller and anode are connected by a protective current that flows from the battery through the controller to the anode and finally into the water. The controller is located in the boat and it's usually mounted on the engine. It sends a signal to the anode which develops a protective field around the sterndrive unit to protect it against galvanic corrosion. It should be wired directly to the battery’s positive terminal with the included in-line fuse. The Mercathode must stay powered up even if the battery switch is turned off.

The anode is coated with platinum so it won’t corrode away. The reference electrode senses the corrosion potential in the water and then regulates the controller for optimum corrosion protection. The system then compensates for water temperature, movement and salt content, even for changes in the condition of the paint on the drive unit. The current required by the system is so small you can operate up to several weeks before having to charge your battery. Merchatode automatically turns off when the boat is removed from the water.

The Mercathode system does not protect internal surfaces which pocket moisture and dirt. Therefore, remember to flush the drive with fresh water before storage. Like sacrificial anodes, the mercathode anode and reference anode should never be painted. Never clean the anode, this could scratch the platinum coating and cause backing to corrode. The mercathode system should be checked once/year to ensure it’s providing adequate protection. Whenever a boat is using stainless steel props or other stainless steel components below the waterline and tied into continuity circuit, a mercathode system or anti-corrosion anode kit should be installed.

Keep reading for future installments of how to prevent marine corrosion.

Thursday, February 12

Crowley’s Tip #9: Know the enemy: Corrosion

Corrosion rates right up there with chafe, moisture, and overzealous birds in terms of universally-despised-by-boaters. But corrosion is not only despised, it is down-right feared. A lot of this fear probably comes from lack of information. If you know what to look for and what you’re dealing with, then you can prevent it from ever being a problem.

Corrosion happens in many types of metals and many types of environments, but there are a lot of misconceptions about what corrosion is and what causes it. Many people mistakenly think that putting metal in water causes corrosion. It is actually a reaction that occurs when certain metals are connected or grounded through water.

For corrosion to occur, five things must be present:


• Two dissimilar types of metals


• A connection between the two metals


• An ion solution to conduct the electricity (electrolyte)


• A potential difference between the metals.


All metals range from very chemically active like zinc and aluminum to less active, like stainless steel or gold. When two or more dissimilar metals are immersed in water, a flow of electrons occurs between them – despite the fact that the metals are not connected to any external source of electric power. The flow of electrons causes the metal that is most chemically active to change. This is called galvanic corrosion. This process speeds up in salt water, polluted water or water with a high mineral content.

Aluminum is especially prone to corrosion. If a drive unit is not protected, galvanic corrosion will destroy components exposed to water. The first signs of galvanic corrosion are paint blistering below the waterline and white corrosion forming on exposed sharp metal edges. As corrosion gets more advanced, exposed metal parts start dissolving away resulting in pitting of the metal. Because gold is the least active metal, it would be the most resistant to corrosion. Unfortunately, most boaters can’t afford a solid gold drive unit. To build a drive unit that delivers the best performance and durability, it takes a variety of metals like lightweight aluminum alloys, hardened steel and stainless steel.


The way to counteract galvanic corrosion is to add a third metal into the circuit, one that is more active than the other two. This piece of metal is called a sacrificial anode, and most often it is zinc. In fact, most boaters refer to sacrificial anodes simply as zincs.

Sacrificial anodes are specifically designed to provide additional protection against galvanic corrosion. Because they’re more active than aluminum, these inexpensive anodes dissolve instead of the expensive drive components. These anodes are easy to replace and must be replaced when erosion reaches 50%. Make sure the anode is tight to ensure electrical contact. Never paint anodes because this will block the anodic protection. For the trim tab anode to work, it cannot inhibit corrosion if raised out of the water. When a boat is removed from the water, anodes do not provide protection. This is why it’s important to flush the engine after each saltwater excursion. Ear muffs, the rubber gaskets that fit on each side of the outdrive’s intake, make this easy. Connect the muffs to a hose, flush the outdrive for two minutes and you're done.

Tuesday, February 10

Crowley's Tip #8 - Know Your Mechanical Limits

engine compartmentKnow your limits when working on your boat’s engine says our lead mechanic, John Stanis. He tells a story about a customer who came in and needed his old Volvo diesel engine rebuilt. The customer didn’t want to pay for it so he tried to do it himself. Six months later, he came to the yard and gave his engine to John – in paper bags.


“The engine was beyond his ability,” John says. “It took me longer and it cost more to rebuild the engine after he worked on it than it would have if he never touched it.”


Another situation you don’t want to touch without a professional is an undiagnosed problem.


“If something smells like harmless exhaust, it could be much more serious, like a fuel spill in your bilge,” John warns. “If you’re not absolutely sure what the problem is, the safest measure is to call a professional.”


When you do bring the boat into your mechanic, always make sure you have clear access to your mechanical systems. This isn’t just so John can get to the problem, it is so you can access the engine space in an emergency. John saw a customer ruin his transmission by starting the engine with a fender line wrapped around the shaft. If you don’t keep your storage separate from your engine compartment, you could also be in trouble if a fire starts or the stuffing box springs a leak. Worse yet, a piece of gear could block your steering completely.

Thursday, February 5

Crowley's Tip #7 - Choosing an effective winter cover

Covering the boat at the end of a Great Lakes boating season is no one’s idea of a good time. The season’s over, the days are shorter and putting the boat away is no small task. Make this big task a little easier by having a plan and the right equipment.

Making and/or applying a good cover is time-consuming and hard work, but the reward is a clean, dry boat when the cover comes off in the spring. The penalty for skimping could be serious damage. A lot of do-it-yourselfers spend hours creating a canopy with the intention of protecting the boat in high winds, heavy snowfall or heavy rains. Unfortunately, time spent does not equal the protection gained.

When planning to cover your boat, you have a few options: buy an inexpensive tarp, order a custom cover, or shrink wrap. Each option has pros and cons, but they all share an important component: a strong frame to support the cover of your choice.

Whatever cover you choose, it must be supported underneath. Otherwise, it can create pockets that collect water, which turns into ice, which adds exponential weight on your cradle or trailer and can damage your boat. Traditional wooden frames are expensive, clumsy and time-consuming to build. They are also difficult to store. You can buy clamps that allow you to custom-build a frame out of steel electrical conduit. These frames are easy to store and erect year after year. Plastic pipe can also be used to build a framework in a similar manner.


Collapsing and torn tarps are usually the consequence of those purchased from home building supply stores that are not installed securely. Although these inexpensive covers can be effective, they must be secured to stand up to very high winds, rain and snow. The key with these tarps is to fit them tightly so they don’t flap in the wind. A flapping cover can wear itself out in one or two storms. Worse, winter-long movement of the cover or the tie-down ropes against fiberglass can scratch or completely wear through the gel coat. Brass grommets flailing in a 40-knot wind will destroy gel coat in one afternoon.

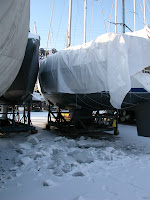
This canopy collected the huge
chunks of ice you see on the ground

Plastic tarps cost a lot less than real canvas, but a custom canvas cover will last longer and is a better fit. Good quality plastic will last a full winter, but by spring there will be worn spots and the grommets will have begun to pull out of the hem. Canvas tarps are heavier, so they don't flap as much. A good canvas shop should turn out a fitted cover that virtually never flaps, even in high winds. Sure, it will move in the wind, but not flap around like an ordinary tarp. This means less likelihood of fiberglass damage from tie-down ropes, grommets or the canvas.

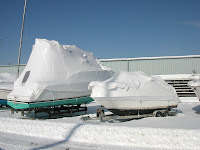
The most hassle-free of all options is shrink wrap. Boat builders initiated the use of this plastic material to protect new boats while they were being shipped via truck. Now shrink wrapping is available to any boat owner. You cannot shrink wrap your boat yourself. A team of professionals equipped with expensive tools cover your boat with a special plastic that shrinks to the shape of your boat when heat is applied. The plastic needed is not sold through retail stores. Because of the labor and materials involved, shrink wrapping is somewhat expensive. And, it is nearly impossible to re-use a shrink wrap cover so you must buy a new one each season.

Shrink wrap covers are the tightest of all covers. They don’t flap, chafe, scratch or wear the fiberglass. They cover so well that decks emerge nearly as clean as they were the day the boat was covered.

In the long run, a fitted cover and its supporting framework is probably the most cost-effective way of covering your boat. Over eight or ten winters, you'll spend a lot more on plastic or canvas tarps than you will on a fitted cover. The only problem is coming up with the money to cover the initial cost.